Star Testing The Telescope


IMG_2040.jpg

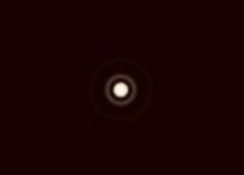
The concentric rings of a de-focused star

IMG_2038.jpg

The focused star

——————————————————————————

Buying a telescope does not stop there…it is essential to know how to star test and to collimate your instrument in order to keep it operating at peek performance. A simple star test can reveal not only improper alignment but optical defects as well.

Every amateur astronomer should get familiar with the star test images. This fundamental test as a tool, will allow you to diagnose optical quality, the adequacy of the alignment and determine the appropriate night for visual or imaging pursuits.

Don’t assume that a new telescope is perfectly collimated. With temperature changes and transport, the alignment can also become less optimal with time, significantly affecting the quality of both the visual and image.

Factors such as tube currents and atmospheric turbulence as well as pinched optics will affect the star test pattern but do not indicate faulty optics. Flaws in the optics will often show themselves as a combination of causes.

The Star Test

Key points to remember before starting the star test

Choose a location from the city and a night of low atmospheric turbulence. If you look up and see twinkling stars…not good for star testing.

The cool down time for a telescope when the tube currents are minimal will vary…for the average size telescope, about 3 hours.

Star testing should be done using a Whatten number 58 (dark green filter) or a Whatten Number 15 (dark yellow) filter. (An explanation for the use of filters can be found in the literature sited at the end of this article.)

Do not use a Barlow or diagonal… additional glass added to the light path increases the likelihood of induced aberrations.

Use a well corrected eyepiece (Nagler, Radian, Plossl or Ortho)

Use an eyepiece that gives at least 50x magnification per inch of aperture of the telescope.

Choose a relatively bright star such as Vega, Capella, Deneb on which to perform the star test.

Make sure the star is centred in the eyepiece to avoid possible effects of aberration in your telescope.

The Star Test Method

Focus and center the star in the eyepiece.

At focus, excellent optics will be indicated by a bright central, round, pinpoint light called the airy disc which is surrounded by 2 or 3 round, concentric rings that fade progressively to the outer edge. The inner most ring should be about 7percent brightness of the airy disc, the next ring out about 3 percent. The rings at each level should have even intensity.

***Note: Atmospheric turbulence can render this pattern less than ideal…in this case you may see the rings as described but there will be gaps of less intensity.

Now compare inside and outside focus at the level of about 5 or 6 rings. As you are star testing with one of the mentioned filters the results will be more easily interpretable than in white light.

(For instance testing an Apo refractor in white light you would find that one side of focus looks more softer and less defined than the other side.)

Testing with the filter, the inside and outside focus should appear the same…round, concentric rings, evenly distributed in intensity, texture and shape, comparing particularly the outside ring of both sides of focus which ideally should be identical.

***Note: A slight difference between inside and outside focus still implies good optics.

If your scope is well collimated, the light rings in the defocused star image will be symmetrical and collapse down concentrically as focus is approached.

Racking out to 10 rings, the round, concentric rings should show evenness of brightness. Bright zones are indicative of poor optics … as in mass produced telescopes.

At this point, test for similarity with the inside and outside focus at the 1 and 2 ring levels. Essentially in this case the aberrations are being compressed down to this level.

***Note: Seldom does a telescope pass the first ring level test for optic qualit

Please remember…

One night of star testing does not render a dependable assessment of collimation or optic quality.

There are no perfect optics. The star test can be subjective and does require a certain amount of practice and experience.

The interpretion of the star test must take into account the expected quality of the optics … at the price level of the telescope. If you are questioning the quality of the optics in this regard, contact your dealer and also compare your results on forums, with owners of the same telescope.

————————————————————————————

You may familiarize yourself with the characteristics and the associated images in the literature of proper collimation and optical quality:

Further Reading:

Star Testing Astronomical Telescopes A Manual for Optical Evaluation and Adjustment

A Star Test Primer

Star Testing Astronomical Telescopes

Familiarize yourself with the images and their interpretations:

Star Testing Your Telescope :


True Colors In Astrophotography?

Recently, I asked a question on my Facebook Group, Astronomy Notebook, about the creation in post processing of the true representative colors of an object. The following is what I have come to understand from the answers I have received and have subsequently read on the subject….

An imaged object can vary in shape and detail depending on the filters used…..Essentially I guess, it all boils down to which filters are being assigned to the different channels and for what purpose…purpose is the keyword….different filters bring out different details in the object. For this reason, the resultant variations in image color are no less representative of the true nature of the object.

The overwhelming natural color in space is green and so I guess post processing to be of more interest visually is legitimate to compensate…also because there are different wavelengths in the color green spectrum these variances in degree or shades of color can fortunately be translated by grey-scale or by filter imaging to bring out representative chemical variances in the object and the different inherent details.

In addition, astrophotography as in any art has its artistic side where one can add the impressions of its creator to the mix…a rather complicated affair.

Here is a good article which I have read on the subject…maybe you could suggest more?

The Thing With Colors in Astrophotography
https://photographingspace.com/ap-color/

Clear Skies,
StarJane

Photographing The Milky Way In Panorama Using A DSLR

30594972_2152894358273849_4596067331200778240_o

Image: The Milky Way : Courtesy of Joshua Rhoades (Joshua Rhoades Photography)


Photographing The Milky Way does not require specialized equipment but does require some planning. This post will discuss imaging of The Milky Way using the DSLR. Camera sensors are becoming more sensitive these days and smartphones are demonstrating their abilities in astrophotography as well … a topic for a future post.

What Is The Milky Way 

The Milky Way Galaxy is home to 400 billion stars. The Milky Way was once seen all over the world but today is observed better in locations farther away from pollution and city lights. To the naked eye it presents itself as a misty cloud speckled with dark patches due to interstellar dust blocking light from beyond. We are viewing the galaxy edge on and see only the spiral arm wherein Earth is located. Depending on the time of year and our location on Earth the bright center of the Galaxy is visible near the constellation Sagittarius. In the Northern Milky Way just below Deneb a star found in the constellation Cygnus is the brightest part, the North American Nebula…a rewarding view with binoculars…see also The Best Milky Way Targets for Stargazers.

If we could follow the Milky Way below the horizon it would be seen as a complete ring encircling the Earth.(The Milky Way 360 degree image : Popular Science )

Best Time To Photograph The Milky Way

In the Northern Hemisphere, look towards the southern skies to see the galactic core of The Milky Way. The core will start to be visible due southeast (Spring), due south (Summer), or southwest (Fall). The core is visible from March to October. But the best time for viewing it is from late April to late July, because the galactic center is visible for longer during the night. The months of June and July are the best.

In the Southern Hemisphere, look towards the southern skies to see the galactic core. In this case, the core will start to be visible due southwest (Spring) or southeast (Fall and Winter). The core is visible from February to October, being in the middle of the winter, June and July, when the core is most visible.

The new moon with clear skies would be the best time to image The Milky Way.  Ideally choose a night within 4 days before or after the new moon. In general the clearest skies occur following the passing of a cold front in the weather. In North America, The Dark Sky Finder and the Clear Sky Charts will help you choose an area away from city lights and check the astronomer’s weather forecast. Elsewhere in the world use the Dark Site Finder, The World Atlas Of Artificial Night Sky Brightness and the Blue Marble Navigator.

Plan Your Photography Session

Programs such as Stellarium, SkySafari , Ephemeris, PhotoPills or PlanIt  help to plan the time of shooting with respect to the angle and elevation of the Milky Way. That means  using these apps allow you to plan the time, location and whether you want the Milky Way to be vertical, diagonal or horizontal in the sky. As far as composing the image is concerned and according to your taste, it may be favorable to include a little of the horizon… for this reason going to the chosen site before nightfall will allow you to plan your imaging with respect to the landscape.

Since the band of The Milky Way spans such a wide distance across the sky, the best approach in order to capture the full band and in relatively greater detail then a single or stacked wide field image would be to take a series of single images for each frame and to use software to stitch the images together making a panorama.  Stacking multiple images for each frame in either approach would create a more detailed final image. This process would entail additional overall exposure time and tracking would be required to offset star trailing however.

The Choice Of DSLR And Lens 

The light gathering ability of a camera does not directly depend on whether it has a full frame or crop sensor but on the focal length of the lens used and its aperture diameter. The full frame camera sensor has a bigger potential light catching ability but the amount of light actually getting to the sensor varies with the choice of lens depending on its focal length and aperture diameter. The reason why full frame sensor cameras are useful is that they give one the choice to use a lens of longer focal length and hence larger light collection capacity than that allowed with crop sensor cameras.

For any given camera, the focal length of lens and its aperture diameter will dictate the allowed exposure with regard to star trailing. The resultant image from a 15mm f/2.8 lens having an aperture diameter of 5.4 (15 divided by 2.8) will gather less light and be more noisy than with lenses of larger aperture such a 24 mm f/1.4 or 35 mm at 1.4, for example…but a with a smaller field of view which can be amended by creating a series of overlapping images stitched together as a mosaic…a panorama. The larger the lens focal length…the more images needed to shoot the mosaic and the greater the detail of the final image.

The larger the pixel size of a camera, the greater the resultant noise due to dark current… not significant for short exposure such as imaging the Milky Way on a camera and tripod, but definitely evident in long exposure deep space astrophotography.

The DSLR Setup

  • Use a tripod which has a bubble level so you can make sure the camera is shooting  from a level position. The tripod needs to have a head with a rotating base.
  • Mount the camera vertically to get as much of the lanscape and sky as possible in each image.
  • Choose a lens between 14 to 50 mm in focal length and ideally a very wide aperture such as f/1.4 or f/2.8. However the lens that comes with the DSLR, usually the 18-55mm f/3.5-5.6 is quite adequate with which to begin.
  • Cover the view finder to prevent stray light from entering the camera.
  • Set the camera to manual mode.
  • For most DSLRs the image stabilization has to be turned off.
  • Set the white balance to 3800K temperature or set one of the settings your camera has, such as daylight. This is not required if shooting in raw but does help when viewing the LCD monitor.
  • An intervalometer remote timer is preferable.
  • Shoot in RAW as it will give better noise reduction and shadow boosting in post-processing.
  • Turn off long exposure noise reduction as this will add to the exposure time and make stitching the resultant images more difficult due to possible star trailing. Instead to adjust for noise take 10 -30 dark frames for every shutter/iso combination used.,.to be applied to the light frames in post-processing.
  • Note that if you are shooting in RAW (unlike JPEG) the white balance does not need to be set but will make viewing on your camera LCD screen much better, especially when checking out the histograms on your test shots.
  • Before the shot, focus the camera using the LCD view finder by zooming in on a bright star. Better still is the use of a Bahtinov mask. For a full frame sensor camera use the “Rule of 500” to find the time of exposure (500 divided by the lens focal length = exposure in seconds). If your camera has a crop sensor find the exposure time by the following formula: 500 divided by (the lens focal length x crop factor) = exposure in seconds.
  • Perform test shots on the brightest and darkest regions. Use the highest native iso that does not cause any blowouts or over-exposure of the image…check the histogram of the test images. A good starting iso with which to perform test shots would be 3200.

The Panorama Method

Determine the “no parallax point” (use to be called the nodal point) for the camera focal length you will be using for your panorama. The parallax point is the point where the light crosses over before it hits the sensor. This point will differ depending on the lens and its focal length. It is around this point that the camera should be rotated when imaging for a panorama because it will allow each consecutive image to be taken from the same point of view facilitating the accurate stitching together of the images. Finding the setting of the “no parallax point” is accomplished by using an L bracket and a rail attached to the tripod as in the following U tube video tutorial: How to determine lens nodal point for panoramic photography)  Setting up  the “no parallax point” is not required for the use of very short focal length lenses or in photography lacking foreground. If landscape is to be included in the panorama setting the “no parallax point” is important but if there is only sky in the image, it is not a factor.

When taking the shots, start to the left and bottom one frame more than you will think you will need for the final image and to the right and top in this manner as well… because almost certainly you will want room to crop the image in post processing.

Each frame should have between 30 to 50 percent overlap with the previous image so as to facilitate stitching later (some photographers say that 50% is really too much). A Tutorial: Stacked Astrophotography Panoramas from lonelyspeck.com shows how…and what is learned in this tutorial can be applied generally with the software of your choice. A panorama of multiple stacked images will require a tracking mount to prevent star trails and would no longer be a simple tripod affair, unless the lens would be of short focal length (14 – 18 mm) and the  images limited to about 4 for each frame.

Stacking, Stitching And Further Post-Processing

Pixel Fixer is a great program for this if it supports your camera model because it can work on RAW files. Other programs like StarStaX can also use dark frames as TIFFs. More dark frames make for better analyzing, but not every program can do this.

For multilevel or multi-row images Hugin has been recommended…which is free. I have used Microsoft Composite Editor with success and is free as well. This can also be accomplished by the “pay for” software such LightRoom CC and Starry Landscape Stacker.

Once the image is stacked and stitched, further processing can be done in various free software such as Gimp, RawTherapee, LightZone or those which are “pay for” such as Photoshop, PTGui and PixInsight.


Entanglement: The Key To Understanding The Universe?

quantum20160212-16

Image: Credit: NASA/JPL-Caltech

 Preface:

Quantum Entanglement has been demonstrated by physicists. The Big Bang is a theory, but generally agreed upon by physicists. The unproven idea that entanglement extends its effects beyond the sub-atomic to the macroscopic world and is fundamental to the universe has been discussed by some scientists. This post serves merely to present one of a vast number of opinions… concerning the nature of our universe.

…………………………………………………………….

Two Particles are said to be entangled when the measurement state of one allows for the state of the other to be known. Einstein called it “Spooky-Action-At-A-Distance”. This phenomenon is independent of distance. Particles as a result of their collision or interaction, may become entangled by a mechanism as yet not understood and then act as if one particle. Essentially at a distance there is no transference of information between them…they become one particle for all intent and purposes. Physical properties such as position, momentum, spin, polarization, energy, and time have been proven in the lab to be correlated among entangled particles. Knowing the characteristic of one particle allows instant knowledge of the other… even across a vast distance. This phenomenon was predicted by The Quantum Theory and has been proven by experimentation with distances in the kilometers to date.

The seemingly limitless ability of the human imagination and that of the study of mathematics have led to many theories about our world, some of which were only much later proven to be correct. Due to the very nature of entanglement creating the interdependency of all things in the universe, scientists are able to predict by drawing inference from their discoveries and hence to extrapolate and formulate new theories in turn, which are initially unable to be proven by experiment. Simply by knowing the characteristics of one thing another thing can be inferred due to their relationship or interdependency. This is the beauty of entanglement.

At the time of the Big Bang, entanglement could be said to have provided the mechanism where by sub-atomic particles at the quantum level were created and further became differentially associated as simple atoms which in turn served as the primordial building blocks in the creation of the universe. As such building blocks in our world are so prevalent it would stand to reason that entanglement does not abruptly end at the quantum level but that it extends to the macroscopic world as a mechanism governing all interactions in the universe.

Erwin Schrodinger, one of the early advocates of Quantum Theory, and who also coined the name “entanglement” said the following: “I would not call entanglement one but rather the characteristic trait of quantum mechanics.” Not only does atomic matter become entangled; whole systems may become entangled, too. “Physicists now believe that entanglement between particles exists everywhere, all the time, and have recently found shocking evidence that it affects the wider, ‘macroscopic’ world that we inhabit.”

Entanglement could be described as being “the interdependency of everything” both at a macroscopic level and at a sub-atomic level in our universe. Without its contribution the universe may not have been created. It may be the mortar between the building blocks. It is possible that entanglement creates and connects up the space-time continuum from smaller components which have characteristics vastly different than the observable whole. For example at the quantum level space-time has no meaning. Theoretically, if Quantum Entanglement as proven by experiments can take place between distances in space instantly then it would logically follow that such would be also apply to time as well. This would leave open the intriguing possibility that information could transcend the past, present and future. It may also imply that our world is but a construct of pure consciousness. Matter, time and space would then be described as constructs of consciousness. What would the nature of consciousness be then …a complex and coordinated dynamic arrangement of energy differentially arranged by the process of entanglement… essentially, organized information giving rise to the creation of a multidimensional reality which we in turn experience within a conscious universe.


Required: A “World Plan” For The Earth And Habitation Of Space


PIA08736~small

Image: The Clouds Over Titan : Courtesy of Nasa.gov


We must become a multi-planetary species. Our fate in the cosmos will be determined by how soon we are able to follow in the path of our robotic explorers, Voyager, Galileo and Cassini. It is imperative that we push on at a more rapid pace toward the related discoveries of space travel and space health before governmental spending is too overwhelmed by the costs of remedying the ailments of a sadly mismanaged Earth.

Directed and sufficient funds must now be allocated by government and not only left up to rich entrepreneurs, to facilitate more rapid discoveries which are related to our autonomous and sustained habitation of space. It is not enough to provide more funds but to also promote an overall “world plan” and to instill cooperation by all businesses and countries. In this manner our resources as a whole will be best used and prevent needless wastage of time, effort and money. This endeavour must be paralleled at the same time with a unified and significant effort of sustaining our beautiful Earth. It is imperative that these two tasks have no borders, no longer to be considered an unspoken race of supremacy. We no longer have the luxury of time to be involved with the comparatively petty rivalries of competition. Our long term continued existence and all that we have thus far accomplished is now at risk.

It has been criticized that had we not taken the route of developing the Space Station so extensively, we would have probably sent humans to Mars by now. There is argument for both cases, hind-site playing a big part. In any case the goal should now be at establishing outposts beyond Earth, served only to be “stepping stones” to a next world that is habitable for man. Terraforming Mars is a long term and expensive project that some say could take a 1000 years to accomplish. This may not be immediately, or ever required depending on the developments in space travel in the near future. What is important is that we go to Mars with the idea of establishing a liveable environment for a limited number of  specialists, not a large population. These pioneers will have the task of building the next space vehicle which will propel man to our next home.

As was commented of the Space Station, let it not be said that too many resources were spent on long term endeavours such as terraforming Mars. Let us be more focused and unified in the future on the goals of developing new forms of space travel, finding solutions for the related physical and health consequences of low gravity and radiation in space and choosing a world more easily and less expensively developed to sustain our existence, other than Mars. Many scientists say that Titan, a moon of Saturn is the nearest and best candidate.