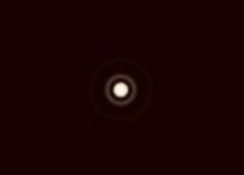
The concentric rings of a de-focused star

The focused star
——————————————————————————
Buying a telescope does not stop there…it is essential to know how to star test and to collimate your instrument in order to keep it operating at peek performance. A simple star test can reveal not only improper alignment but optical defects as well.
Every amateur astronomer should get familiar with the star test images. This fundamental test as a tool, will allow you to diagnose optical quality, the adequacy of the alignment and determine the appropriate night for visual or imaging pursuits.
Don’t assume that a new telescope is perfectly collimated. With temperature changes and transport, the alignment can also become less optimal with time, significantly affecting the quality of both the visual and image.
Factors such as tube currents and atmospheric turbulence as well as pinched optics will affect the star test pattern but do not indicate faulty optics. Flaws in the optics will often show themselves as a combination of causes.
The Star Test
Key points to remember before starting the star test
Choose a location from the city and a night of low atmospheric turbulence. If you look up and see twinkling stars…not good for star testing.
The cool down time for a telescope when the tube currents are minimal will vary…for the average size telescope, about 3 hours.
Star testing should be done using a Whatten number 58 (dark green filter) or a Whatten Number 15 (dark yellow) filter. (An explanation for the use of filters can be found in the literature sited at the end of this article.)
Do not use a Barlow or diagonal… additional glass added to the light path increases the likelihood of induced aberrations.
Use a well corrected eyepiece (Nagler, Radian, Plossl or Ortho)
Use an eyepiece that gives at least 50x magnification per inch of aperture of the telescope.
Choose a relatively bright star such as Vega, Capella, Deneb on which to perform the star test.
Make sure the star is centred in the eyepiece to avoid possible effects of aberration in your telescope.
The Star Test Method
Focus and center the star in the eyepiece.
At focus, excellent optics will be indicated by a bright central, round, pinpoint light called the airy disc which is surrounded by 2 or 3 round, concentric rings that fade progressively to the outer edge. The inner most ring should be about 7percent brightness of the airy disc, the next ring out about 3 percent. The rings at each level should have even intensity.
***Note: Atmospheric turbulence can render this pattern less than ideal…in this case you may see the rings as described but there will be gaps of less intensity.
Now compare inside and outside focus at the level of about 5 or 6 rings. As you are star testing with one of the mentioned filters the results will be more easily interpretable than in white light.
(For instance testing an Apo refractor in white light you would find that one side of focus looks more softer and less defined than the other side.)
Testing with the filter, the inside and outside focus should appear the same…round, concentric rings, evenly distributed in intensity, texture and shape, comparing particularly the outside ring of both sides of focus which ideally should be identical.
***Note: A slight difference between inside and outside focus still implies good optics.
If your scope is well collimated, the light rings in the defocused star image will be symmetrical and collapse down concentrically as focus is approached.
Racking out to 10 rings, the round, concentric rings should show evenness of brightness. Bright zones are indicative of poor optics … as in mass produced telescopes.
At this point, test for similarity with the inside and outside focus at the 1 and 2 ring levels. Essentially in this case the aberrations are being compressed down to this level.
***Note: Seldom does a telescope pass the first ring level test for optic qualit
Please remember…
One night of star testing does not render a dependable assessment of collimation or optic quality.
There are no perfect optics. The star test can be subjective and does require a certain amount of practice and experience.
The interpretion of the star test must take into account the expected quality of the optics … at the price level of the telescope. If you are questioning the quality of the optics in this regard, contact your dealer and also compare your results on forums, with owners of the same telescope.
————————————————————————————
You may familiarize yourself with the characteristics and the associated images in the literature of proper collimation and optical quality:
Further Reading:
Star Testing Astronomical Telescopes A Manual for Optical Evaluation and Adjustment
Star Testing Astronomical Telescopes
Familiarize yourself with the images and their interpretations: