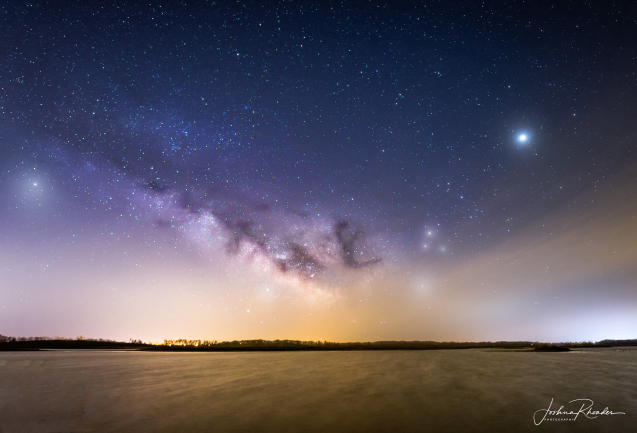
Image: The Milky Way : Courtesy of Joshua Rhoades (Joshua Rhoades Photography)
Photographing The Milky Way does not require specialized equipment but does require some planning. This post will discuss imaging of The Milky Way using the DSLR. Camera sensors are becoming more sensitive these days and smartphones are demonstrating their abilities in astrophotography as well … a topic for a future post.
What Is The Milky Way
The Milky Way Galaxy is home to 400 billion stars. The Milky Way was once seen all over the world but today is observed better in locations farther away from pollution and city lights. To the naked eye it presents itself as a misty cloud speckled with dark patches due to interstellar dust blocking light from beyond. We are viewing the galaxy edge on and see only the spiral arm wherein Earth is located. Depending on the time of year and our location on Earth the bright center of the Galaxy is visible near the constellation Sagittarius. In the Northern Milky Way just below Deneb a star found in the constellation Cygnus is the brightest part, the North American Nebula…a rewarding view with binoculars…see also The Best Milky Way Targets for Stargazers.
If we could follow the Milky Way below the horizon it would be seen as a complete ring encircling the Earth.(The Milky Way 360 degree image : Popular Science )
Best Time To Photograph The Milky Way
In the Northern Hemisphere, look towards the southern skies to see the galactic core of The Milky Way. The core will start to be visible due southeast (Spring), due south (Summer), or southwest (Fall). The core is visible from March to October. But the best time for viewing it is from late April to late July, because the galactic center is visible for longer during the night. The months of June and July are the best.
In the Southern Hemisphere, look towards the southern skies to see the galactic core. In this case, the core will start to be visible due southwest (Spring) or southeast (Fall and Winter). The core is visible from February to October, being in the middle of the winter, June and July, when the core is most visible.
The new moon with clear skies would be the best time to image The Milky Way. Ideally choose a night within 4 days before or after the new moon. In general the clearest skies occur following the passing of a cold front in the weather. In North America, The Dark Sky Finder and the Clear Sky Charts will help you choose an area away from city lights and check the astronomer’s weather forecast. Elsewhere in the world use the Dark Site Finder, The World Atlas Of Artificial Night Sky Brightness and the Blue Marble Navigator.
Plan Your Photography Session
Programs such as Stellarium, SkySafari , Ephemeris, PhotoPills or PlanIt help to plan the time of shooting with respect to the angle and elevation of the Milky Way. That means using these apps allow you to plan the time, location and whether you want the Milky Way to be vertical, diagonal or horizontal in the sky. As far as composing the image is concerned and according to your taste, it may be favorable to include a little of the horizon… for this reason going to the chosen site before nightfall will allow you to plan your imaging with respect to the landscape.
Since the band of The Milky Way spans such a wide distance across the sky, the best approach in order to capture the full band and in relatively greater detail then a single or stacked wide field image would be to take a series of single images for each frame and to use software to stitch the images together making a panorama. Stacking multiple images for each frame in either approach would create a more detailed final image. This process would entail additional overall exposure time and tracking would be required to offset star trailing however.
The Choice Of DSLR And Lens
The light gathering ability of a camera does not directly depend on whether it has a full frame or crop sensor but on the focal length of the lens used and its aperture diameter. The full frame camera sensor has a bigger potential light catching ability but the amount of light actually getting to the sensor varies with the choice of lens depending on its focal length and aperture diameter. The reason why full frame sensor cameras are useful is that they give one the choice to use a lens of longer focal length and hence larger light collection capacity than that allowed with crop sensor cameras.
For any given camera, the focal length of lens and its aperture diameter will dictate the allowed exposure with regard to star trailing. The resultant image from a 15mm f/2.8 lens having an aperture diameter of 5.4 (15 divided by 2.8) will gather less light and be more noisy than with lenses of larger aperture such a 24 mm f/1.4 or 35 mm at 1.4, for example…but a with a smaller field of view which can be amended by creating a series of overlapping images stitched together as a mosaic…a panorama. The larger the lens focal length…the more images needed to shoot the mosaic and the greater the detail of the final image.
The larger the pixel size of a camera, the greater the resultant noise due to dark current… not significant for short exposure such as imaging the Milky Way on a camera and tripod, but definitely evident in long exposure deep space astrophotography.
The DSLR Setup
- Use a tripod which has a bubble level so you can make sure the camera is shooting from a level position. The tripod needs to have a head with a rotating base.
- Mount the camera vertically to get as much of the lanscape and sky as possible in each image.
- Choose a lens between 14 to 50 mm in focal length and ideally a very wide aperture such as f/1.4 or f/2.8. However the lens that comes with the DSLR, usually the 18-55mm f/3.5-5.6 is quite adequate with which to begin.
- Cover the view finder to prevent stray light from entering the camera.
- Set the camera to manual mode.
- For most DSLRs the image stabilization has to be turned off.
- Set the white balance to 3800K temperature or set one of the settings your camera has, such as daylight. This is not required if shooting in raw but does help when viewing the LCD monitor.
- An intervalometer remote timer is preferable.
- Shoot in RAW as it will give better noise reduction and shadow boosting in post-processing.
- Turn off long exposure noise reduction as this will add to the exposure time and make stitching the resultant images more difficult due to possible star trailing. Instead to adjust for noise take 10 -30 dark frames for every shutter/iso combination used.,.to be applied to the light frames in post-processing.
- Note that if you are shooting in RAW (unlike JPEG) the white balance does not need to be set but will make viewing on your camera LCD screen much better, especially when checking out the histograms on your test shots.
- Before the shot, focus the camera using the LCD view finder by zooming in on a bright star. Better still is the use of a Bahtinov mask. For a full frame sensor camera use the “Rule of 500” to find the time of exposure (500 divided by the lens focal length = exposure in seconds). If your camera has a crop sensor find the exposure time by the following formula: 500 divided by (the lens focal length x crop factor) = exposure in seconds.
- Perform test shots on the brightest and darkest regions. Use the highest native iso that does not cause any blowouts or over-exposure of the image…check the histogram of the test images. A good starting iso with which to perform test shots would be 3200.
The Panorama Method
Determine the “no parallax point” (use to be called the nodal point) for the camera focal length you will be using for your panorama. The parallax point is the point where the light crosses over before it hits the sensor. This point will differ depending on the lens and its focal length. It is around this point that the camera should be rotated when imaging for a panorama because it will allow each consecutive image to be taken from the same point of view facilitating the accurate stitching together of the images. Finding the setting of the “no parallax point” is accomplished by using an L bracket and a rail attached to the tripod as in the following U tube video tutorial: How to determine lens nodal point for panoramic photography) Setting up the “no parallax point” is not required for the use of very short focal length lenses or in photography lacking foreground. If landscape is to be included in the panorama setting the “no parallax point” is important but if there is only sky in the image, it is not a factor.
When taking the shots, start to the left and bottom one frame more than you will think you will need for the final image and to the right and top in this manner as well… because almost certainly you will want room to crop the image in post processing.
Each frame should have between 30 to 50 percent overlap with the previous image so as to facilitate stitching later (some photographers say that 50% is really too much). A Tutorial: Stacked Astrophotography Panoramas from lonelyspeck.com shows how…and what is learned in this tutorial can be applied generally with the software of your choice. A panorama of multiple stacked images will require a tracking mount to prevent star trails and would no longer be a simple tripod affair, unless the lens would be of short focal length (14 – 18 mm) and the images limited to about 4 for each frame.
Stacking, Stitching And Further Post-Processing
Pixel Fixer is a great program for this if it supports your camera model because it can work on RAW files. Other programs like StarStaX can also use dark frames as TIFFs. More dark frames make for better analyzing, but not every program can do this.
For multilevel or multi-row images Hugin has been recommended…which is free. I have used Microsoft Composite Editor with success and is free as well. This can also be accomplished by the “pay for” software such LightRoom CC and Starry Landscape Stacker.
Once the image is stacked and stitched, further processing can be done in various free software such as Gimp, RawTherapee, LightZone or those which are “pay for” such as Photoshop, PTGui and PixInsight.
